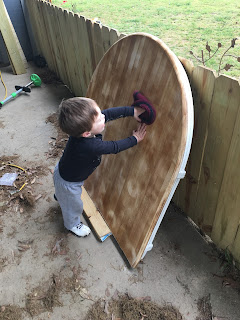
Originally, this table was oblong. I had my handy and might I add super cute husband cut it down to this size. The next step was to sand the table top (Raided super cute hubby's tools). All you need is a sander and your headphones. I suggest Bob Marley's "Three Little Birds". Everything is easy peasy when you are listening to reggae music right? Plus it sound way better than a sander!
After you have sanded your piece, wipe it down with a dry cloth, then a wet one and let it dry. Kids can help with this part. My 2 year old hobbit is always a good helper. He is always quick to remind me when we have almost skipped second breakfast and elevensies.
Next comes finding the perfect circle! It just so happens that I have another old table that I use around my fire pit (Another rode side find!) I used a small 2x4 to put it at the correct height then I traced it with a pencil. I used the same 2x4 to then put the brick shapes around the circle. Since My husband has a woodworking hobby I have access to lots of wood. I found a piece a little wider to trace lines of the boards for Bilbo's door. My wee hobbit played with his fishing pole while I did all this, which was super helpful and did not make any of this extremely difficult.
Now you have your basic hobbit hole outlined. I took mine inside my new craft room because it's super windy today and I didn't want dirty in my paint. The first thing I did was take some black paint and roughly paint the wood of the door so that it was show through my green. I am going to go back later with brown to touch it up. It worked pretty well. So far so good!
The next step in this process is the most important!!!! Check on your hobbit, especially if they are quiet!!! No large amount of damage done. Ok let's move on.
While the green is drying you can start on the bricks. Brick color was a little difficult since I didn't have the right red and I was not going to the store with my little golum, opps I mean hobbit. Red and brown mixed up made a decent brick color after some experimentation. I didn't care if it all matched since I wanted it to look like real bricks and they are never the same. I mixed Anita's Acrylic Earth Brown and Dark Red.
Next as Tolkien writes we need, "courage and some wisdom, blended in measure" the painted details are coming! Guys, I AM NOT AN ARTIST!!! I have been made fun of actually for not being able to draw and paint. My handwriting is even atrocious! However, I am getting better! Just dive in and try. I think part of learning to paint is just getting rid of the fear of screwing up. I have one sign that I have painted over like five times!!! All it says is The Shire! lol Everything can be fixed or done over! Well... except the demise of the one ring! It's gone forever! Poor Smeagol. Anyone else feel sorry for him at the end?
Anyways, here are some tips I have learned along the way with paint.
1. Use a smaller brush that you think you need. You can always make something larger after you get the basic outline right.
2. Use less paint. Again you can always add, but it's hard to delete something.
3. Trace anything you can!! If you can trace it or transfer it, DO IT! Who cares if it's cheating. Maybe one day with practice you won't have to cheat.
4. Get the right brushes! Don't buy the cheapest and know which ones to use. Google is awesome and youtube has the answer to everything in life yall!
5. Wait on your hobbit to take a nap before you start the hard stuff.
The details on this are pretty easy. Elton John and the Beatles will help your stress level if you are like me and freak every single time the paint brush touches the craft you are painting (Pandora Beatles Station has been my jam today). However, as Tolkien says, "Faithless is he that says farewell when the road darkens" so on and on we go we go, brushes in hand, till our adventure is over! Tip: I dipped my brush in paint then water then blotted it a little to make the faint lines of grout and wood grain.
You can call it done at this point or paint the remainder of the table that is showing. I think adding a real knob will really make this pop. You could also paint one in the center. The pictures do not really capture how cute this turned out. I cannot wait to place this in my little hill and put plants and a small fence around it. When I am finished all of you in Middle Earth are welcome to come see my own little Bag End in the Shire:)
"The road goes ever on and on, down from the door where it began..." -Tolkien
Cindy W.
-Crafter, Mom, Travel Nut and Happy Hobbit
-Crafter, Mom, Travel Nut and Happy Hobbit


No comments:
Post a Comment